

Allow HTTP
From Edge 2.22, the web interface is served by default over HTTPS, and requests that arrive over plain HTTP are redirected to HTTPS. For environments where HTTPS is impractical, the Allow HTTP setting lets the device also serve the interface over HTTP. It is off by default and should only be turned on deliberately. For background on the default HTTPS behaviour, see Security Certificates.
HTTP is served alongside HTTPS, not instead of it:
- Allow HTTP off (default): requests over HTTP are redirected to HTTPS, so all traffic is encrypted.
- Allow HTTP on: requests over HTTP are served over HTTP, while HTTPS continues to work as before. Clients that connect over HTTP are simply no longer redirected.
Enable HTTP
Section titled “Enable HTTP”Via Settings
Section titled “Via Settings”-
Open the Edge web interface and log in.
-
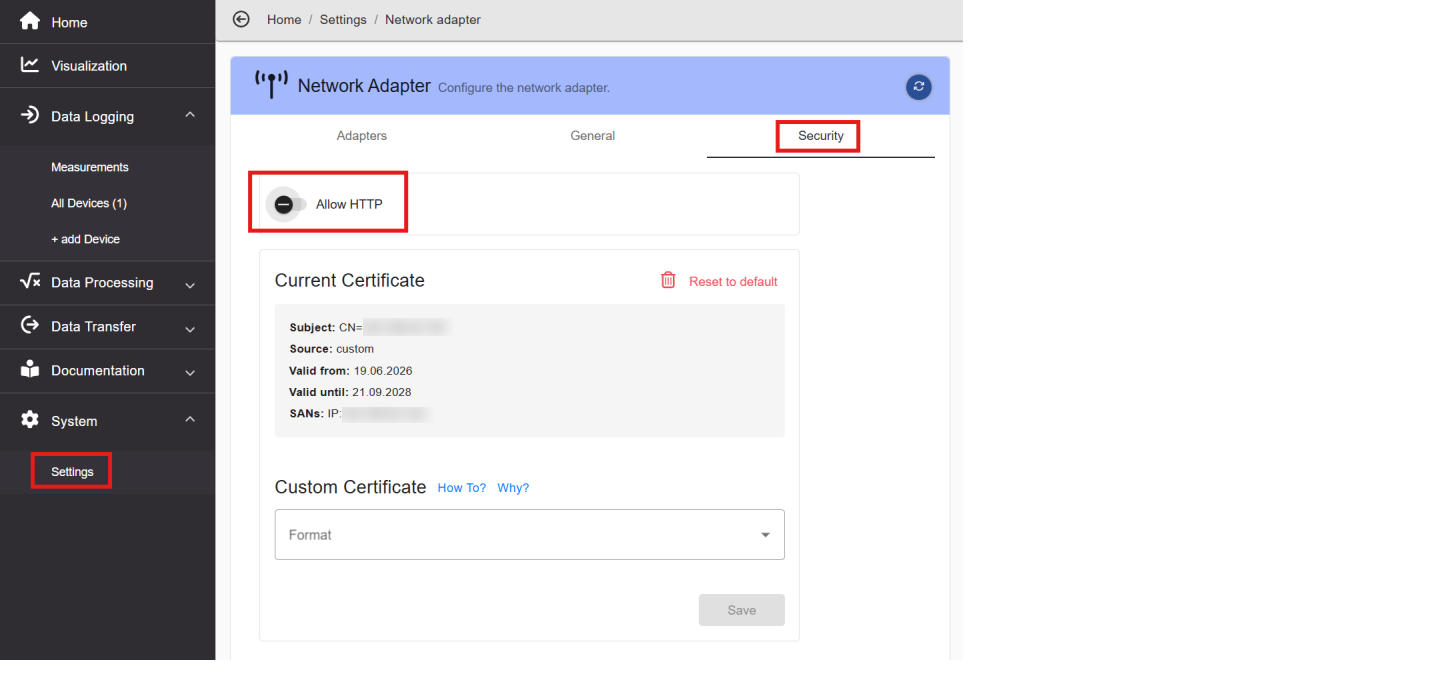
Go to Settings → Network Adapter and locate the Allow HTTP setting.
-
Turn on Allow HTTP. A security warning appears — read it and confirm that you accept the risks. The setting is applied immediately; there is no separate save step.
-
A Reload WebUI via HTTP button appears. Click it to switch your current browser session to HTTP, or simply change
https://tohttp://in the address bar yourself.
Via Setup Wizard (during initial setup)
Section titled “Via Setup Wizard (during initial setup)”-
Start the Setup Wizard for the Edge device.
-
In the Network Adapter step, turn on Allow HTTP and confirm the security warning.
-
Continue and complete the wizard.
Switch back to HTTPS only
Section titled “Switch back to HTTPS only”To return to HTTPS-only access, turn Allow HTTP off again in the same place. HTTP requests are then redirected to HTTPS as before.
To get a clean HTTPS connection with no certificate warning, install a certificate your computers trust — see Install a Custom HTTPS Certificate.